Step 1: Open Account Settings #
- Log in to your WebOps account.
- Click on Profile from the side menu.
- Select Account Settings.
You will now be redirected to your profile page.
Step 2: Update Your Profile Information #
Under the Account Info section, you can edit:
- Full Name
- Phone Number
- Preferred Language
- Account Currency (view-only)
Click inside any editable field to update your information. Your changes are saved automatically.
Step 3: Change or Remove Your Profile Image #
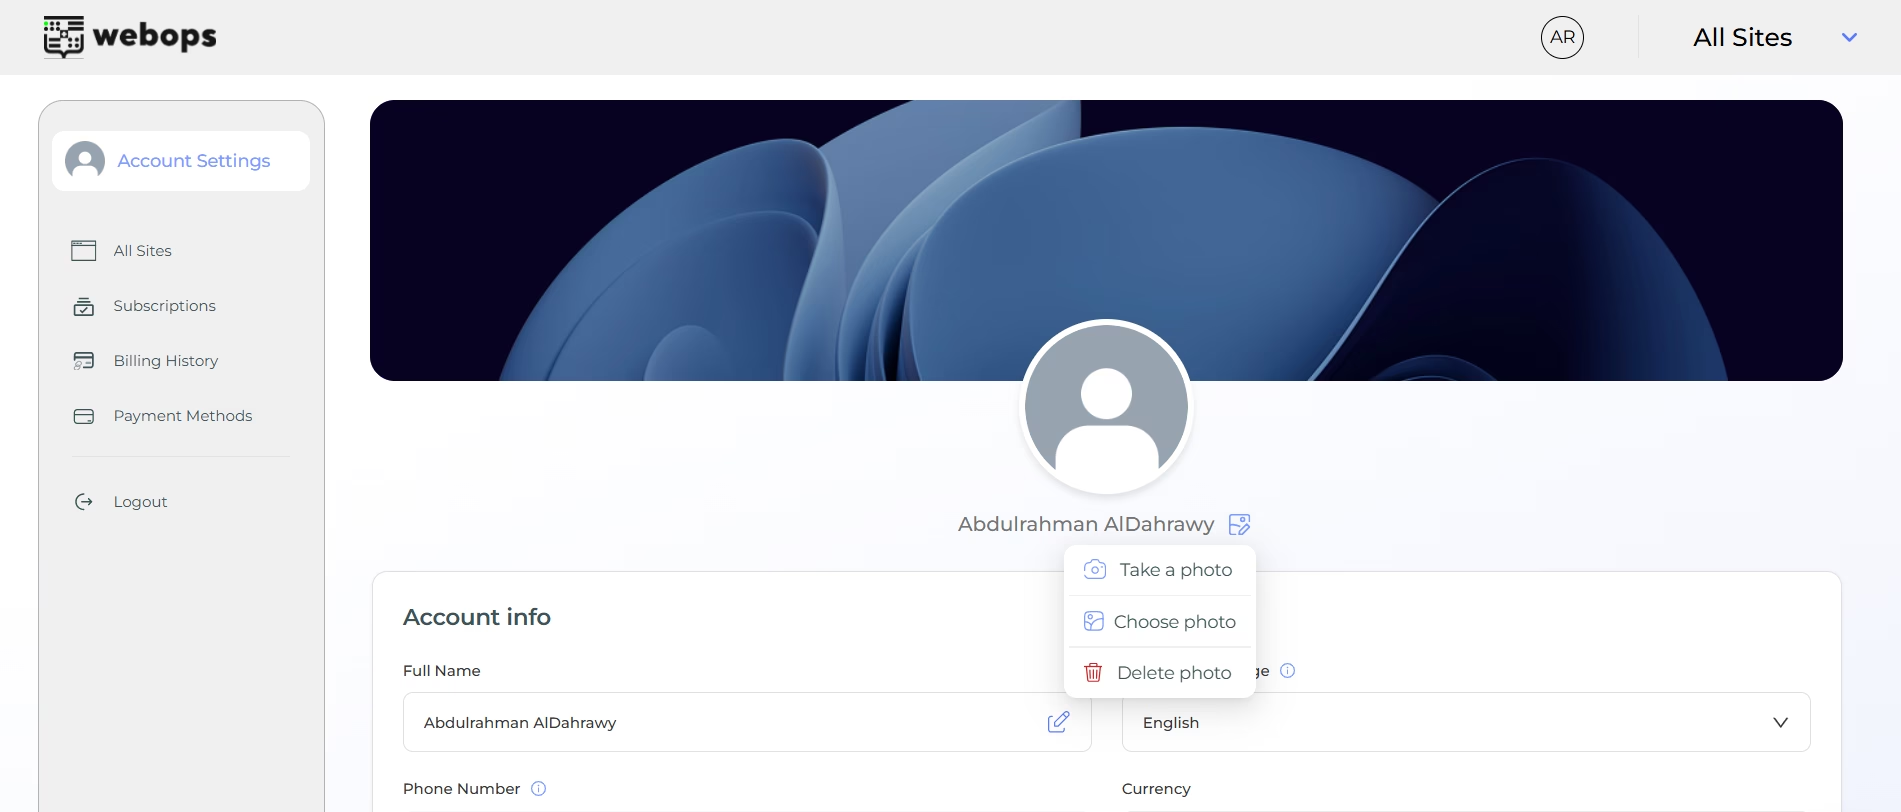
- Click on the edit icon next to your profile image.
- Choose one of the following options:
- Take a photo using your camera
- Choose a photo from your device
- Delete photo to remove your current profile image
- Once selected, your profile image will be updated instantly.
Step 4: Change Your Password #
- Under the Login Info section, click Change Password.
- A popup will appear where you need to:
- Enter your current password
- Enter your new password
- Confirm your new password
- Click Save to apply the changes, or Cancel to exit without saving.
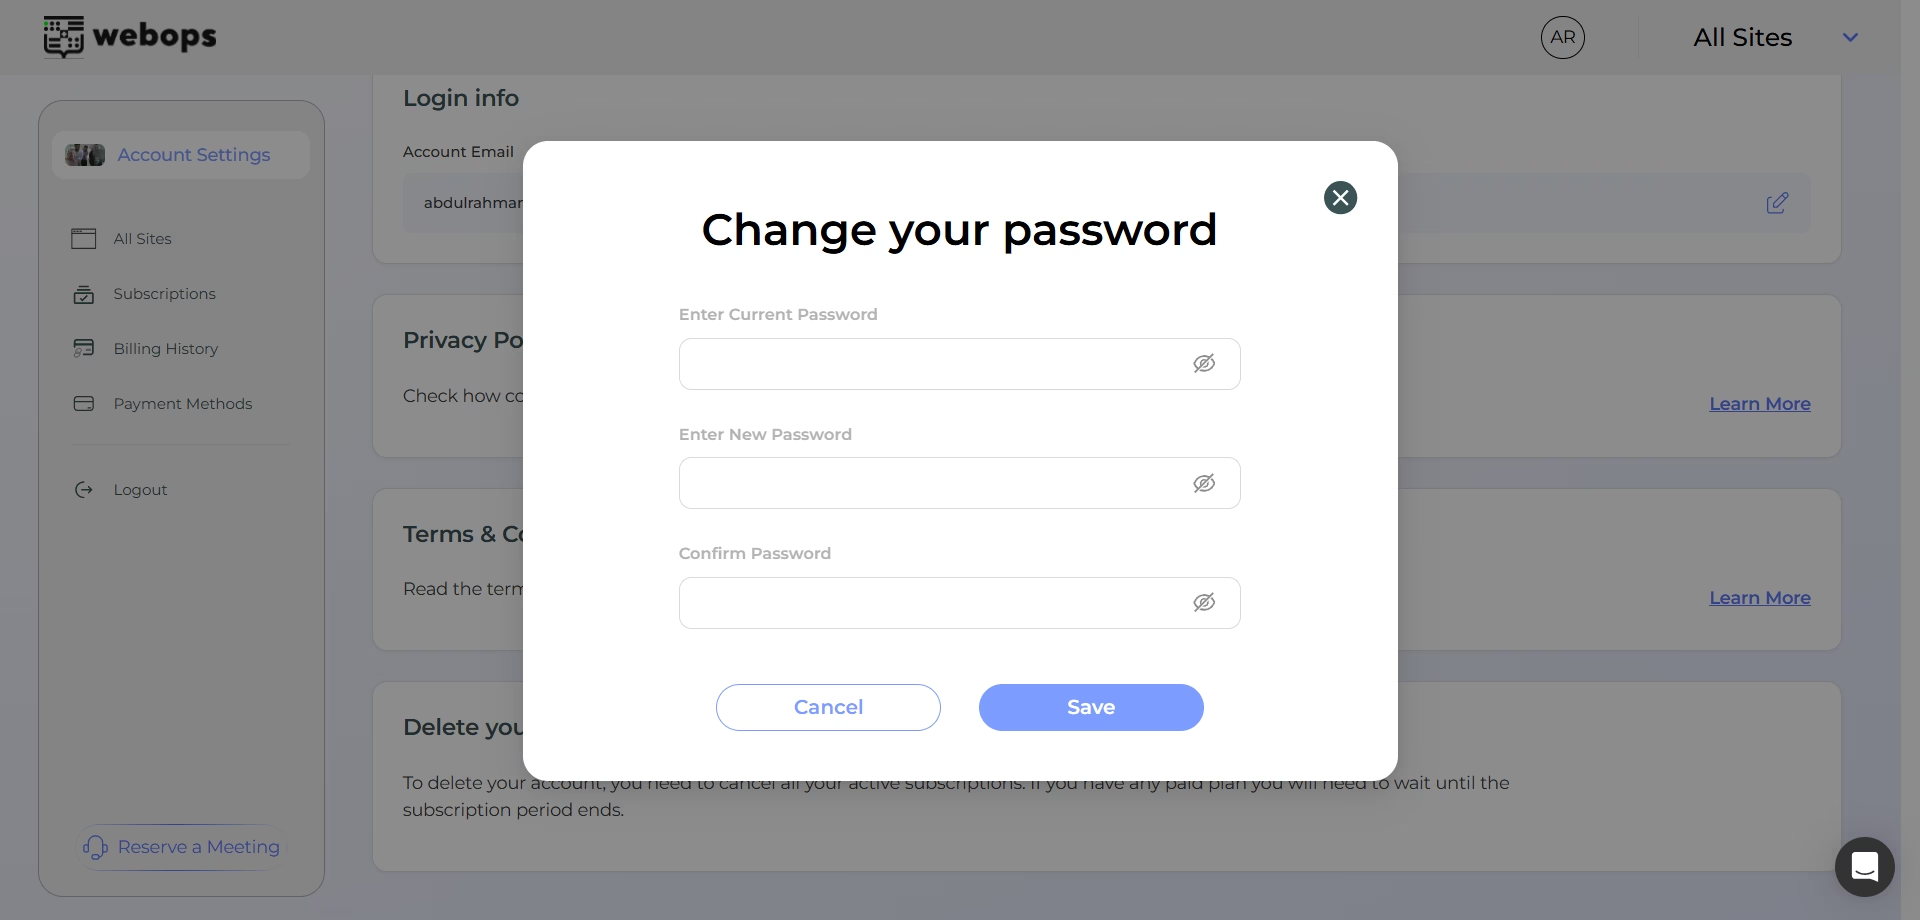
✅ Your password will be updated immediately after saving.
Step 5: Change Your Account Email #
- Under the Login Info section, click the edit icon next to your email address.
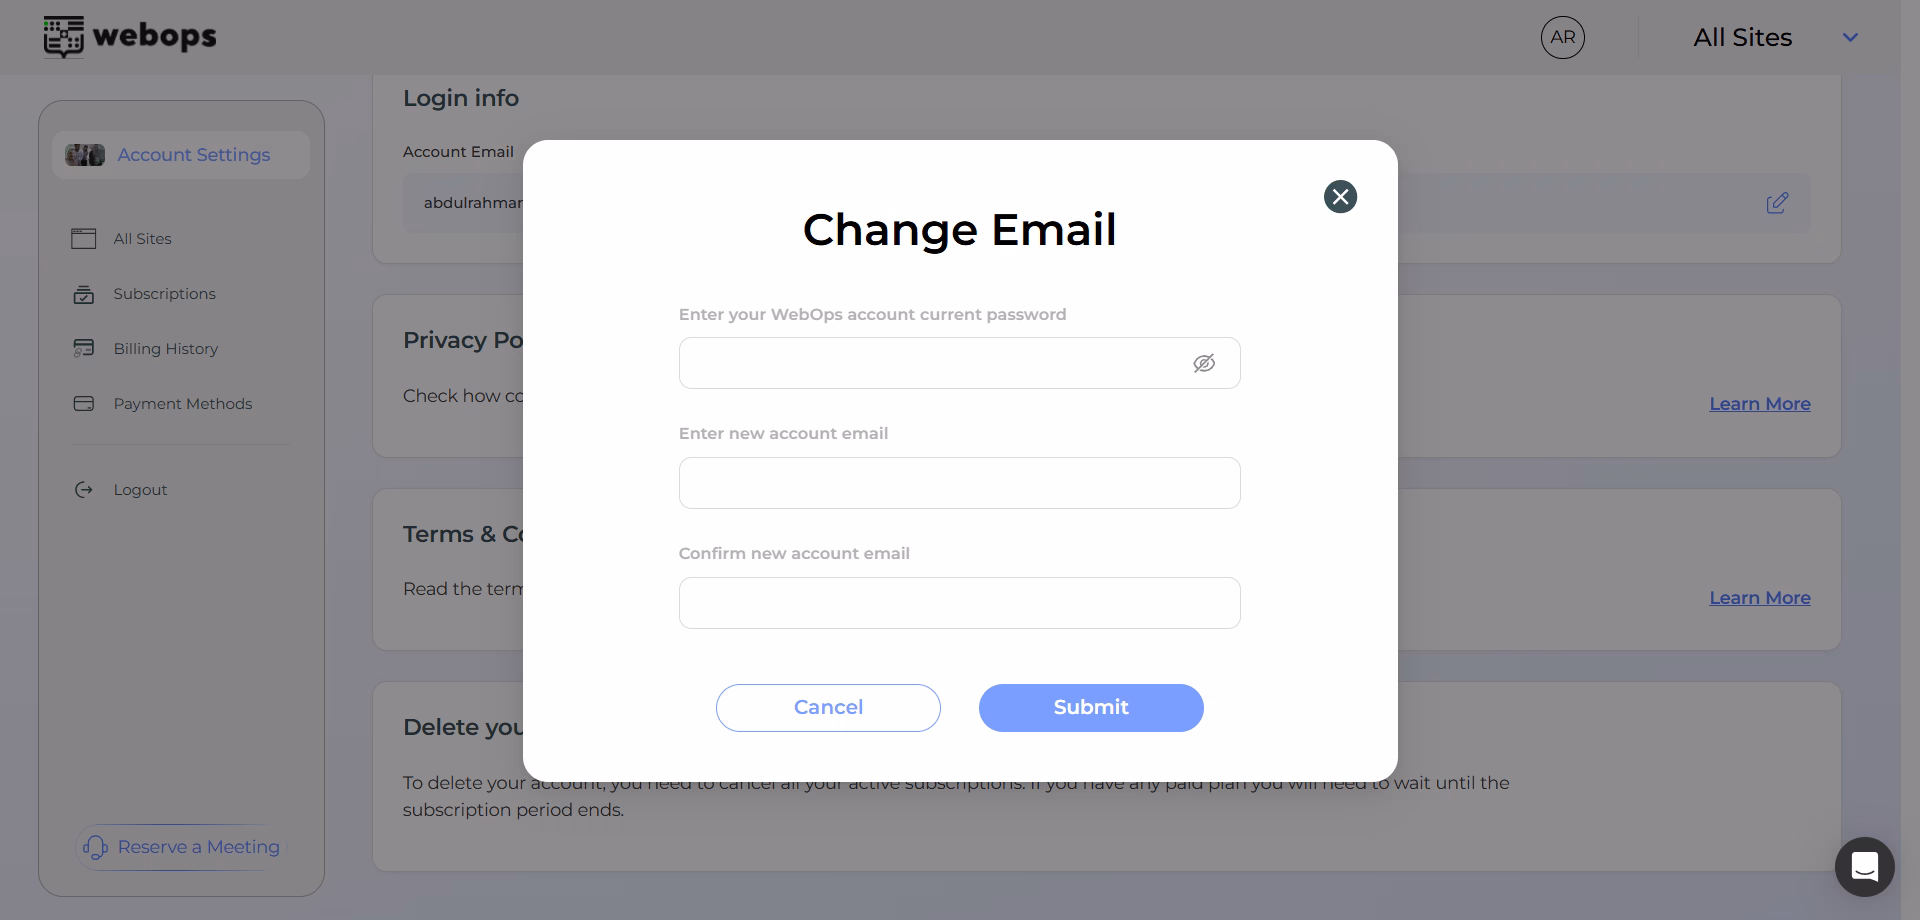
- A popup will appear asking you to:
- Enter your current account password
- Enter your new email address
- Confirm your new email address
- Click Submit to proceed.
What happens next:
- You will be logged out automatically for security.
- A verification email will be sent to your new email address.
- Open the email and click the verification link to confirm the change.
✅ Once the verification link is confirmed, your account email will be updated successfully. You can now log in using your new email address.
Step 6: Review Privacy Settings #
Under the Privacy Policy section, you can:
- Learn how cookies are used
- Review how your data is protected
Click Learn more for full details.
Step 7: Delete Your Account (If Needed) #
Before you can delete your account, please make sure:
✅ You do not have any active subscriptions
✅ All billing plans are fully canceled
If an active subscription exists, the system will not allow account deletion until it is canceled.
To delete your account: #
- Scroll to the Delete Your Account section.
- Click Delete Account.
- You will be redirected to a confirmation page where you must:
- Select a reason for deletion
- (Optional) Add more details about your reason
- Enter your account password to confirm
- Click Confirm Delete to complete the process.
⚠️ Important: Once deleted, your account and all associated data will be permanently removed and cannot be recovered.